How to replace an image in the WordPress Media Library by uploading a new file in its place
WordPress has no Replace button, so a new photo usually means editing every page that showed the old one. Here is how to upload a new file in the old one's place instead, so every page shows it at once, and what to do when the old image still shows.
The short answer
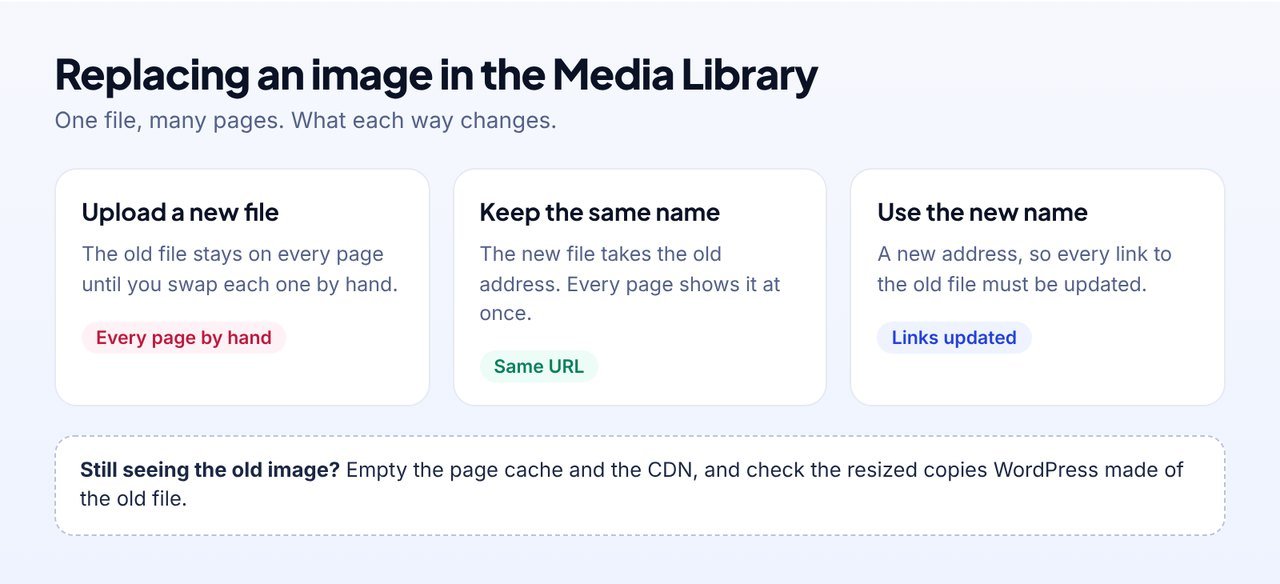
To replace an image in the WordPress Media Library, upload the new file onto the existing media library item instead of adding a new one. WordPress cannot do this on its own, so use a media replace plugin, or WPCentrify Media replacement if you manage several websites. Keep the same name to keep the same address, or use the new name and let the tool update every link. Then empty the page cache and check the page in a private window.
Disclosure: WPCentrify is our product. Facts about WordPress and other tools come from their own pages, checked 3 November 2026.
Why WordPress has no Replace button
WordPress treats every upload as a new item. Its own Edit Media screen can crop, rotate, flip and scale a picture, and put the original back, but it cannot swap the file for a different one. A request to add a Replace button to the media library has been open on WordPress's own tracker since May 2012.
The reason it matters: when you place an image on a page, the page keeps its own copy of the image's address. Page builders such as Elementor and Divi keep their own copy too. So a new upload, however you name it, appears on none of those pages until you swap it on each one by hand. Miss one and that page shows the old picture, or a broken image if you deleted the old file.
Uploading a new file in the old one's place fixes that, because every page is already pointing at the old file's place.
Before you replace an image
Two minutes of checking saves the most common mistakes:
- Note the file type. To keep the same name and address, the new file has to be the same type: a JPEG for a JPEG, a PNG for a PNG.
- Match the shape. A tall photo in place of a wide one is squeezed or cropped by the theme. Crop the new picture to the same proportions first.
- Compress it. A 6 MB photo straight off a phone makes every page that shows it slower. Export it at the size it is shown, as WebP or a well-compressed JPEG.
- Find where it is used. Search your pages, or use a tool that lists them, so you know which pages to check afterwards.
- Keep a copy of the old file. Download it from the media library, in case the new one is wrong.
How to replace an image in the WordPress Media Library, step by step
Whatever tool you use, replacing an image comes down to the same five steps:
- Find the image and see where it is used. Open Media, then Library, and find the image by name. Before you change it, check which pages, posts and page-builder sections show it, so you know what will change.
- Get the new file ready. Use the same file type if you want to keep the name, such as a JPEG for a JPEG, and ideally the same shape, so the picture still fits where it sits. Compress it before you upload.
- Upload the new file in place of the old one. Use a replace tool, such as a media replace plugin or WPCentrify Media replacement, to upload the new file onto the existing media library item instead of adding a new one.
- Choose the file name and the date. Keep the same name to keep the same address, or use the new file's name and let the tool update every link to the old file. Pick the date the file should carry in the media library.
- Clear the caches and check a page. Empty the page cache and any CDN, then open a page that uses the image in a private window, on a computer and a phone, to check the new image shows.
Four ways to replace an image in WordPress
There are four ways to do it, and they differ in what they leave behind:
| Way | Every page updated | Smaller sizes made again | Undo | Best for |
|---|---|---|---|---|
| Upload a new image and swap it on each page | No, page by page | Yes | Swap back by hand | An image on one or two pages |
| Overwrite the file over SFTP | Yes, same name only | No | Only if you kept a copy | Developers, with a copy of the old file |
| A media replace plugin | Yes | Yes | Depends on the plugin | One website you sign in to |
| WPCentrify Media replacement | Yes | Yes | 35 days, links included | Every website you manage, from one dashboard |
1. Upload a new image and swap it on each page
This is the only way WordPress offers on its own. Upload the new picture in Media, Add New, then open each page, post and page-builder section that used the old one, select the image and choose the new file. Write the alt text again, because the new upload starts with none. Fine for an image on one or two pages, slow and easy to get wrong for a logo or a team photo used across the site.
2. Overwrite the file over SFTP or your host's file manager
Upload the new file into wp-content/uploads/ under exactly the same name, over the old one. Every link to the full-size picture now shows the new file. The catch is that WordPress never hears about it. The smaller sizes it made of the old picture (files like team-photo-768x512.jpg) are still the old picture, and those are what most visitors' browsers load, so phones often keep showing the old image. There is also no undo. Use it only if you are comfortable regenerating the thumbnails afterwards and kept a copy of the old file.
3. Use a media replace plugin
A media replace plugin adds a Replace button to each item in the media library. The best known is Enable Media Replace, with more than 600,000 active installs on WordPress.org. It offers the two choices most replace tools offer: replace the file and keep its name, or replace the file, use the new name and update every link to it, plus a choice of date for the media library. It is a good answer for a website you sign in to. It is one more plugin to install, update and keep secure on every website, and you still sign in to each website to use it.
4. Replace it from WPCentrify, on any website you manage
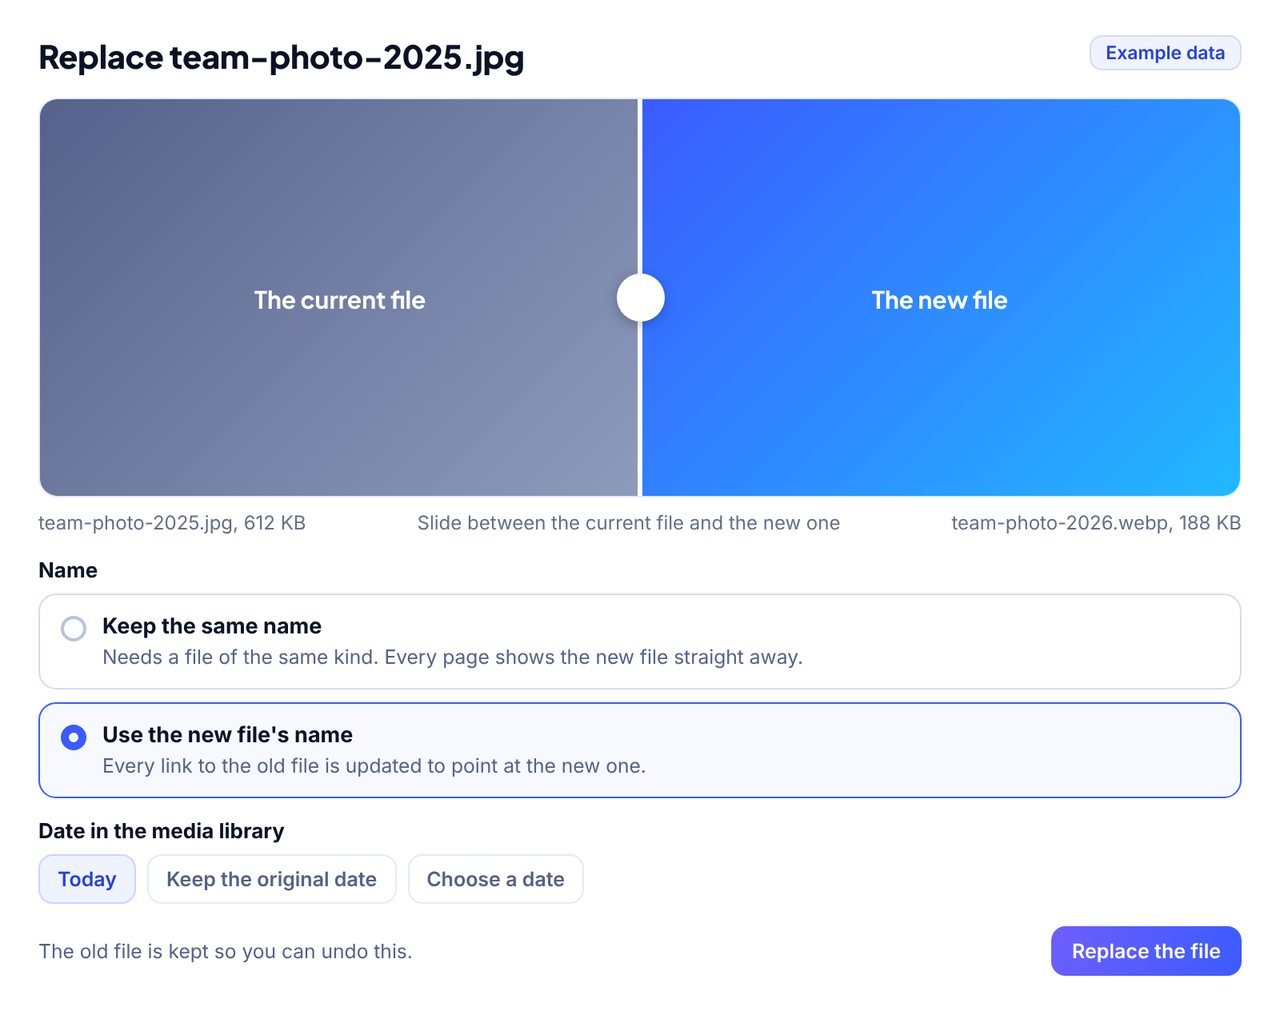
If you look after more than one WordPress website, WPCentrify Media replacement does the same job from one dashboard, without signing in to WordPress. It is part of WPCentrify, the WordPress management tool we build, so read this part as ours. Open the website, go to Content, Media replacement, press Where is it used? to see every page that shows the file, press Replace and drop in the new one. For a picture, a slider compares the current file and the new one before anything changes.
- Keep the same name, or use the new file's name and every link to the old file is updated, smaller sizes included.
- The smaller sizes are made again for the new picture, and the page caches are emptied.
- The old file is kept for 35 days. Press Put back and it returns, links and all.
- Every replacement is written to the activity log: who, when and which file.
Keep the same file name or use the new one?
Keep the same name when the new file is simply a newer version: a refreshed photo, an updated price list PDF, a tidied logo. The address does not change, so every page, menu and page-builder section shows the new file straight away and there is nothing else to update.
Use the new file's name when the name itself matters. A descriptive name such as smile-dental-team-2026.webp says more to a search engine than IMG_4021.jpg, and a new file type always means a new name. Every link to the old file then has to move to the new one, which a good replace tool does for you.
How to replace a JPG with a WebP or PNG
A JPEG and a WebP are different files with different names, so this is always a new-name replacement:
- Export the new picture as WebP, at the size it is shown on the page.
- Replace the old JPEG with the WebP and choose to use the new file's name.
- Let the tool update every link to the old JPEG, including its smaller sizes.
- Open a page that shows it and check the address of the picture now ends in .webp.
Done by hand, step 3 is a search and replace across the database. Our guide to finding and replacing text in WordPress covers how to do that safely, page builders included.
Why does the old image still show after you replace it?
You replaced the file, opened the page, and there is the old picture. It is almost never the replacement that failed. In the order to check:
- Your browser's cache. Browsers keep pictures by their address, so with the same name your browser may reuse the copy it already has. Open the page in a private window, or press Ctrl and F5 (Cmd, Shift and R on a Mac).
- A page cache. A caching plugin or your host keeps a ready-made copy of each page. Empty it. WPCentrify empties the website's page caches for you after a replacement.
- A CDN. Cloudflare and other CDNs keep their own copy of pictures and pages until it is purged or expires. Purge the file or the cache from the CDN's dashboard.
- The smaller sizes. If only phones or only some sections show the old picture, the smaller sizes WordPress made of it were not replaced. This is what overwriting over SFTP leaves behind.
- A copy outside the media library. A picture set in the theme's CSS, the Customizer or a slider plugin's own settings may be a separate file altogether. Change it where it was set.
Using the new file's name sidesteps every cache, because nothing has a copy of an address that did not exist before.
Does replacing an image affect SEO?
Replacing an image is fine for search, as long as every page keeps a working image. Keeping the same name keeps the address search engines already know. A new descriptive name can help image search, provided every link moves to it, and the alt text stays with the media library item either way. What hurts is the version where the old file was deleted and a few pages were missed: a broken image, and a page that looks neglected to visitors and search engines alike. A lighter file helps too, because a smaller picture makes the page load faster.
A checklist for replacing an image
- Same file type as the old one, if you are keeping the name.
- Same proportions, so it fits where the old one sat.
- Compressed, and exported at the size it is shown.
- A copy of the old file kept, or a tool with an undo.
- Every page that uses it found before you start.
- The page cache and the CDN emptied afterwards.
- Checked in a private window, on a computer and a phone.
Sources
- Edit Media, WordPress Documentation
- Ticket #20602, Replace media, WordPress Trac
- Enable Media Replace, WordPress.org plugin directory
- HTTP caching, MDN Web Docs
- Purge cache, Cloudflare Docs
All sources checked on 3 November 2026.
Questions about replacing images in WordPress
Not with WordPress alone. The Edit Media screen can crop, rotate, flip and scale a picture, but it cannot swap the file for another one. To replace an image in place, you need a media replace plugin or a tool such as WPCentrify Media replacement, which uploads the new file onto the existing media library item so every page that uses it shows the new one.
Replace the file instead of uploading a new one. When the new file takes the old one's place in the media library, every page, post and page-builder section that points at it shows the new file, with nothing to change page by page. If the new file has a new name, use a tool that updates every link to the old file as well.
Keep the same file name and the same file type. A replace tool that keeps the name puts the new file at the old address, so every link to it keeps working and shows the new picture. Overwriting the file over SFTP also keeps the address, but WordPress does not make the smaller sizes again, so most visitors may still see the old picture.
Almost always a cache. Your browser keeps pictures by their address, a page cache plugin keeps whole pages, and a CDN keeps both. Empty the page cache and the CDN, then check in a private window. If only some screens show the old picture, the smaller sizes WordPress made of it were not replaced.
No. Alt text belongs to the media library item, so a tool that replaces the file on the existing item keeps the alt text. If you upload a new file as a new item instead, it starts with no alt text and you need to write it again.
Yes, but not under the same name, because the file type is part of the name. Use a replace tool that takes the new file's name and updates every link to the old file, including its smaller sizes. Otherwise pages keep pointing at the old JPG.
It works for the full-size file if the name and type stay exactly the same, but it skips everything WordPress does around it. The smaller sizes are not made again, the size WordPress records for the picture is not updated, and there is no undo. Take a copy of the old file first.
Not if the links keep working. Keeping the same name keeps the address search engines already know. A new, descriptive name can help, as long as every link moves to it. What hurts is a page left showing a broken image because the old file was deleted.
It depends on how the image is replaced. Page builders keep their own copy of each image's address, so a replacement that keeps the same address shows straight away. One that changes the name needs a tool that updates the page builder's data as well as the page content.
Only if you kept the old file. WordPress has no undo for a file you overwrote. WPCentrify Media replacement keeps the previous file on the website for 35 days and puts it back, links included, with one click.
Related reading
Replace media in WordPress on every page
Swap any image, PDF or video on any website you manage, see where it is used, and undo for 35 days.
See the featureFind and replace text in WordPress
Change a word, a phone number or an old image address on every page, page builders included.
Read the guideClean up unused media
Find the uploads nothing on the website uses any more and move them to a 30-day bin.
See the featureMore on this topic: WordPress search and replace and WordPress content management.
Replace a file once, and every page shows it
Connect your websites to WPCentrify, open Media replacement and swap any image, PDF or video in seconds, with an undo for 35 days.
Plan prices to be revealed. Start free on one website today.